Posts tagged Studio

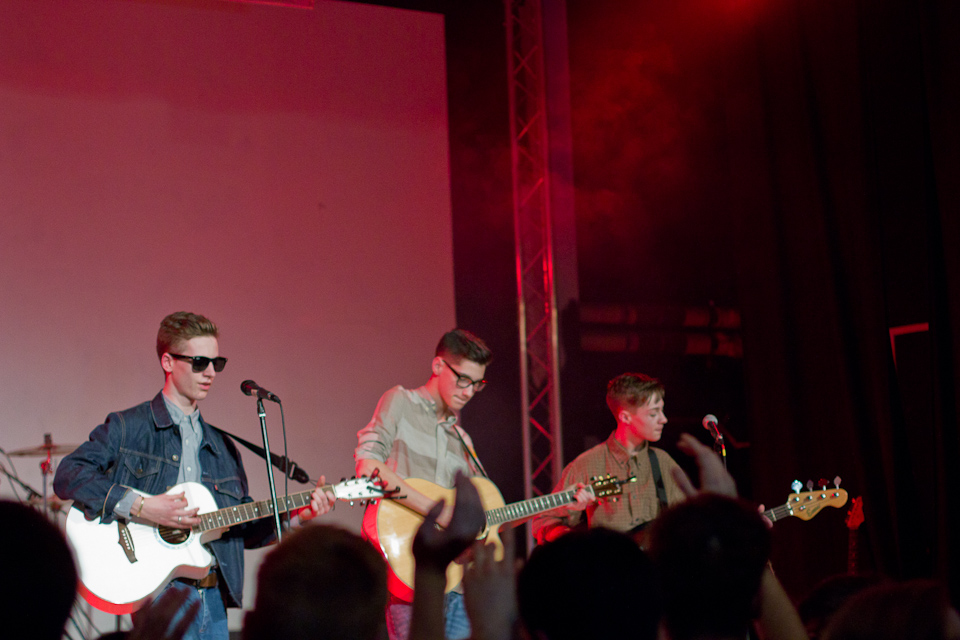
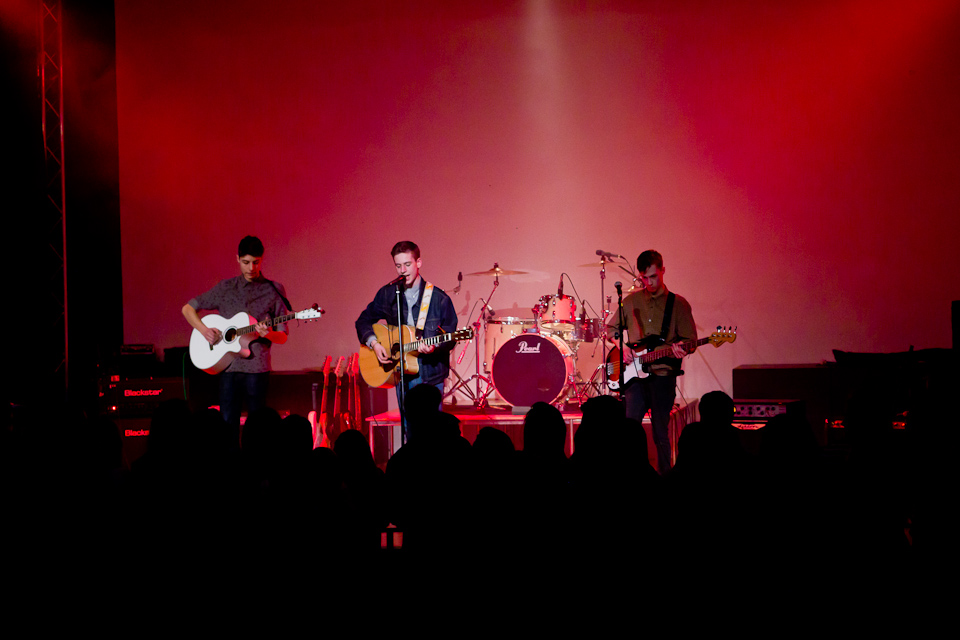
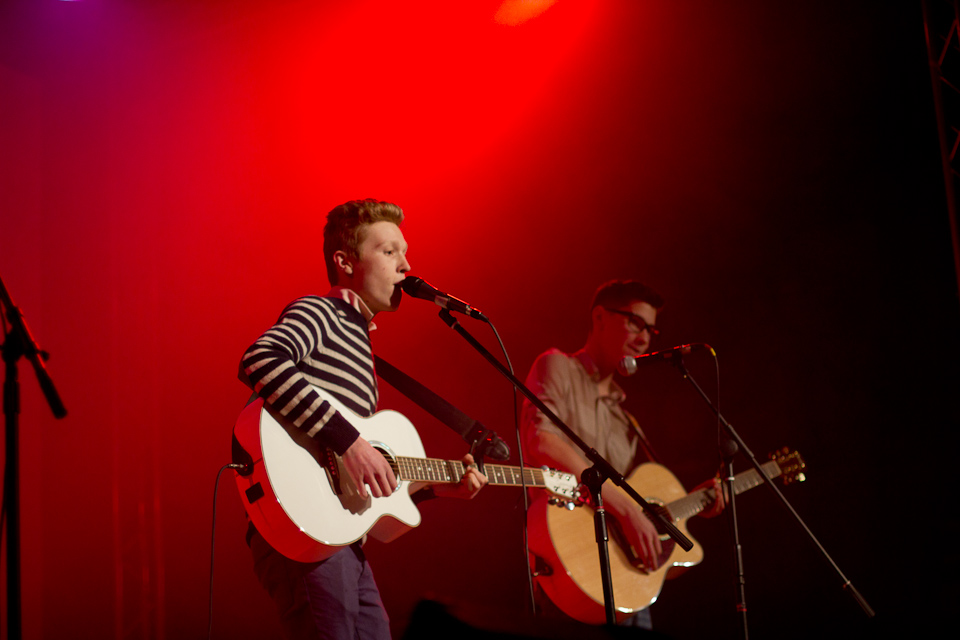
The Deets Present: Battle Of The Bands
One very long day with some amazing results and we’ve pulled it off. Today we were working on The Deets Presents: Battle Of The Bands at Coopers Technology College in Chislehurst. This event was a small budget, Battle of the Bands gig for Coopers Students to battle for the chance to win a day in the recording studio with a professional sound engineer. Using 2 Strand Coda’s, a few Strand Quatet’s and a couple of profiles we managed to knock together a great looking show with nearly no budget. We even managed to take apart the and repair Cooper’s own smoke machine.
Check out some of the photos from the event below:


More can be found on our facebook page here: http://www.facebook.com/pages/Fluxity-Lighting/101581459918126

Penrose Market Fly Away CAD
For the Penrose Market last week we had to create a complete studio in a Rack called a Fly Away. We had to create this Fly Away because the studio facilities at Ravensbourne were in use for another shoot on the same day.

This Fly Away was created using any available kit that we found on Level 9, then using the time in our 208 and 204 lectures to design and build the system with the help of James Uren and the rest of the BET Pathway. After an initial brain storm and specification we came up with a simple system that consisted of:
- 7 SD Cameras
- 1 VT Deck
- 1 16 Channel Vision Mixer
- 1 16×1 Router
- CTP and Jack Field
- 3 Digital DA’s – 1 Analogue DA in the Fly Away
- 8 Digital DA’s – 4 Digital to Analogue Converters in the Monitor Stack
- 10 Monitors
- 1 Large Engineering Monitor
- 1 Test Pattern Genorator
- 2 Wave Form Monitors
The initial brainstorm and scribbled drawing was then drawn up, neatly, onto a large A1 sheet of paper, along with a Cable Schedule and CTP / Jack Field layouts. This large Drawing was then attached to the side of the rack and used as a reference throughout the rest of the project.
 After the project was completed on Tuesday (22/11/2011) we were required as part of our Hardware Systems unit (204) to draw up a full CAD in AutoCad based on the same layers and components that were used to create the CAD’s for the main system in Ravensbourne. This exercise was designed to teach us how to use CAD to create Technical Drawings as well as be confident in reading and updating existing drawings. A screen shot of mine can be found on the right, with a PDF copy of the final cad available for download below.
The technical drawing we had to create was in fact two drawings of two separate systems which interacted closely with each other. The first was the main Fly Away, which was a single rack with all the processing and routing required, and the second was of the Monitor Stack which was required to make the Rack work. This is a major problem with the system as it require one part to work to make the rest work, whilst also doubling the amount of video connections in and out of the rack. However these problems were only noticed after the initial and were not a problem in this project as the monitor stack and rack were being built side-by-side at the same time.
Having so many connection to and from the rack also opened up another problem, which could simply be caused by confusion during the connection of the rack to the video sources and the monitor stack. This confusion could lead to video being sent the wrong way into the system, which could cause damage to equipment, or for example a Camera could be fed into one of the ENG inputs, thus it would appear to work fine on the router but it would have completely bypassed the monitor stack and more importantly the Vision Mixer.
Above I talked about just a few of the problems with last weeks Fly Away, in time I may look into re-drawing the Technical Drawing to alleviate some of the faults mentioned, and when I have re-drawn a new version of the system I will post a comparison between the two.
Download an A1 PDF of my Technical Drawing Here.
Download a PDF copy of my Cable Schedule Here.
PROJECT: Sarah Louise Ings – Live Lounge
0Last friday I was asked to work on this new “Live Lounge” shoot with Ben Blake, for Sarah Louise Ings. For this shoot i was asked to assist light a 30 piece orchestra in the tiny studio at Ravensbourne. When I arrived in the morning and was shown the floor plan, I immediately started to make changes to the lighting rig to cope with the number of performers it needed to cover.
The rig finally consisted of:
- 8 x 1k Fresnel’s
- 3 x 2k Fresnel’s
- 4 x 575w Profiles
- 4 x Mac 250 Entours
- 4 x Parcan’s
The shoot went well after a shaky start, we had some problems with blown lamps and damaged sockets, restricting out pantograph positions, and also the available lighting stock. I’m happy with the outcome of the of the day, and some of the effect created, photo’s to follow.
RITA: Rave In The Afternoon
0 Today’s the day, when we worked closely with the operation students to produce their first TV show, and to give us all a chance to practice the skills we picked up on the Circus.
Today I was originally just the lighting assistant, but in the end with my previous lighting experience, I took over as the lighting director, coming up with the design, and assisting with the rigging.
This morning we got the bulk of the design rigged with in 40 mins of arrival, but after that, we struggled with a few flown lanterns and dimmer channels. the dimmer channels were a major issue as they didn’t allow me to have lights where I required them.
These little issues pushed us slightly behind schedule, but we’ve learnt from them, and now know faster ways to rig in the studio, and other little niggles that are present.
CIRCUS: Studio Camera’s
0Our second to last Circus session today, and it was defiantly one of the most interesting, Studio Camera’s. Heres what I wrote about it in my Circus Report:
Studio Cameras are in some respects simplified versions of PSC cameras, as they don’t have the ability to record directly or capture sound. Studio Cameras are operated by a single operator in the studio and a secondary racking operator in the gallery. The racking operator is responsible for the exposure, white / black balance and the colours. If each camera operator had these controls, the picture wouldn’t be as consistent as if it was operated remotely by one.
We were trained on the Sony HXC100 HD Camera’s, with four being mounted on Vinten Pedestals and the fifth on a non-pressurised Pedestal. The operation of the zoom and focus has moved from the camera body (PSC) to two wired remotes on the pan and tilt handles of the Pedestal, with the exception of number 5, which is designed to be used as a hand held and its pedestal, is only a place to keep it when not in use.
Camera 5 also has a Wide Angle, which again changes the perspective of the studio for the viewer, with this lens the studio looks larger than, when it is viewed with one of the other 4 camera’s which all have the same narrower lens. Graham Reed2 also went through a great deal on perspective and depth of field and how it can greatly effect an images composition. The great example he used was a line of tree’s and showed how using different focal lengths you could make the trees look closer together (narrow angle) or further apart (wide angle), than they truly were.